
Solar Inverter Replacement: DIY or Hire a Professional?
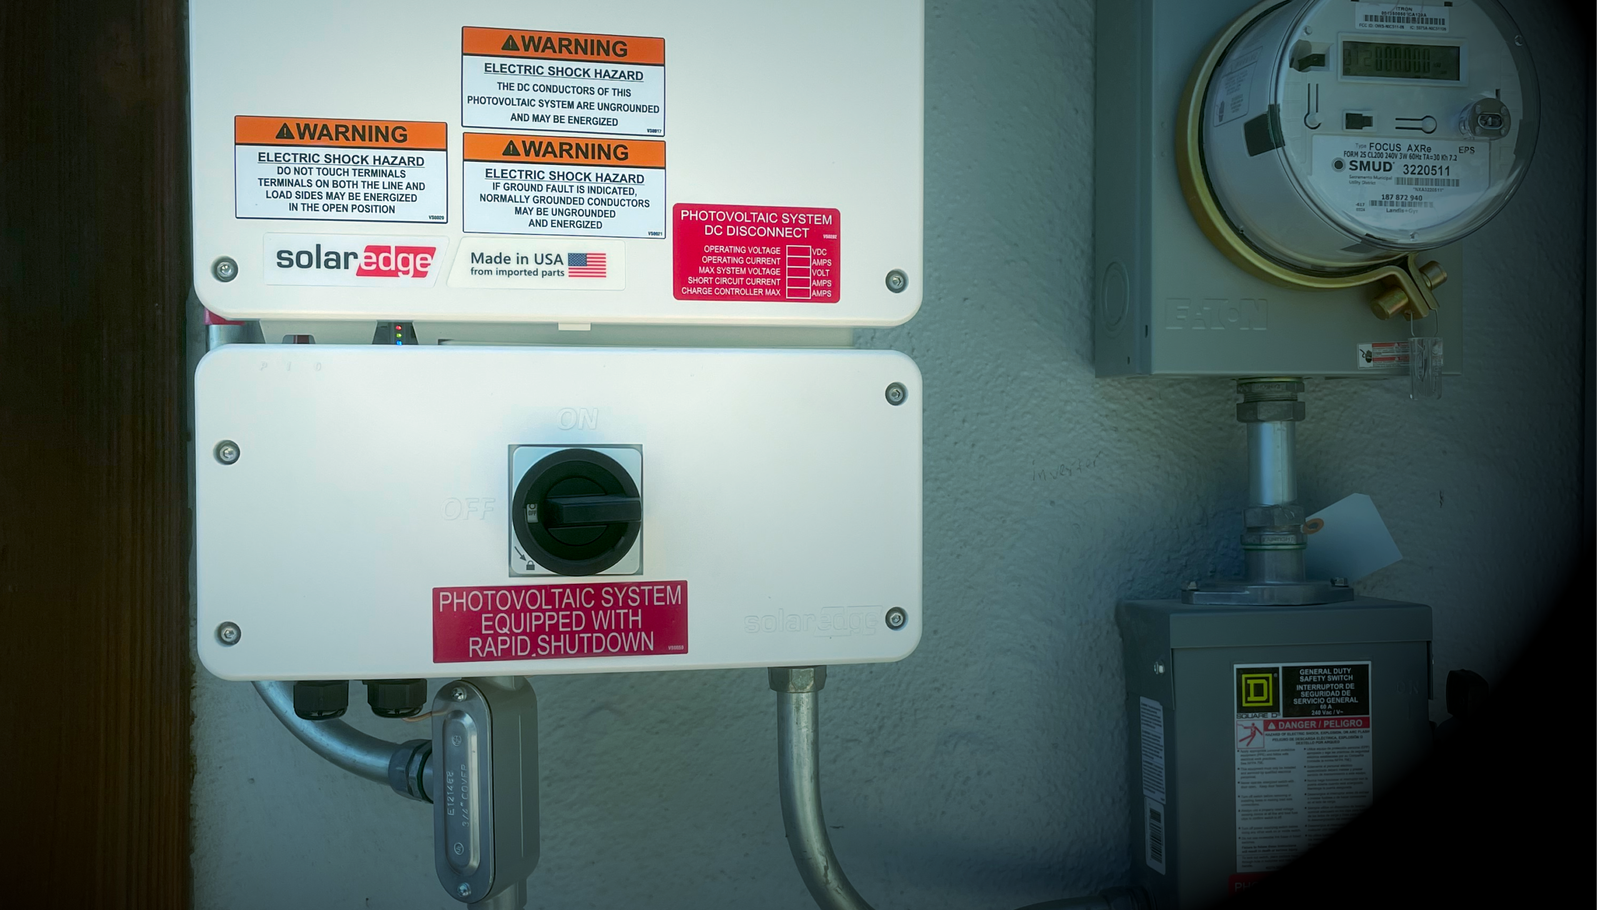
First, let’s get the necessary disclaimer out of the way: photovoltaic system components can expose you to lethal AC and DC voltage. Turning an inverter “off” does not necessarily mean that every conductor inside it is safe to touch.
If you cannot positively identify every possible source of power, isolate those sources, and verify the absence of voltage with properly rated test equipment, do not attempt to replace a solar inverter yourself.
With that out of the way, let’s answer three questions:
- Can I replace a solar inverter myself?
- What tools are required?
- When should I hire a professional?
Can I Replace My Solar Inverter Myself?
In some cases, a homeowner may be legally allowed to replace an inverter on their own property as an owner-builder. In California, that generally means taking responsibility for any required permits, inspections, code compliance, and the overall integrity of the work.
Local requirements can vary, so check with your city or county building department before starting. The California Contractors State License Board explains the responsibilities and risks of working as an owner-builder.
Whether you should replace it yourself is another matter.
A straightforward, like-for-like inverter replacement may look fairly simple. Disconnect the old inverter, mount the replacement, reconnect the conductors, and commission it. In practice, several things can complicate the job:
- More than one source of AC or DC power
- A battery or backup system
- High-voltage PV strings
- Incorrect or poorly labeled wiring
- Damaged conductors or connectors
- Compatibility issues with the existing array
- Manufacturer commissioning requirements
- Monitoring-platform access
- Firmware, grid-profile, or communication setup
- Permit or utility documentation
The physical replacement is often not the hardest part. Correctly identifying the failure, selecting a compatible replacement, safely isolating the equipment, and commissioning the new inverter are where the job can go sideways.
How Do I Make Sure the Solar System Is De-Energized?
Follow the shutdown procedure supplied by the inverter and system manufacturer. The correct sequence varies by equipment and becomes considerably more complicated when batteries, backup equipment, multiple inverters, generators, or supply-side connections are involved.
In general, shutting down a system may require isolating:
- The inverter’s AC supply
- The PV DC input
- Battery circuits
- Backup or load-control equipment
- Additional interconnected power sources
Rapid shutdown should not be confused with complete de-energization. On systems covered by modern rapid-shutdown requirements, conductors outside the array boundary are generally reduced to no more than 30 volts within 30 seconds. Conductors inside the array boundary may remain as high as 80 volts, depending on the system design and equipment.
Older systems may operate differently or may not have module-level rapid shutdown at all.
Even after the external power sources have been isolated, the inverter may contain stored electrical energy. Many manufacturers instruct technicians to wait at least five minutes for internal capacitors to discharge before opening or servicing the equipment. The manufacturer’s instructions for the specific inverter always take precedence over a generic waiting period.
Most importantly, switching everything off is not enough. You must verify the absence of voltage at every electrical part you could contact.
A non-contact voltage tester can be useful as an initial warning device, but it should not be used as the sole method of proving that an inverter is de-energized. That requires an adequately rated meter or voltage tester, used by someone who understands the equipment and knows how to test for AC voltage, DC voltage, backfeed, and voltage to ground.
OSHA’s electrical safety requirements call for test equipment to be used to verify that exposed circuit elements are actually de-energized. You can review those requirements in OSHA Standard 1910.333.
Only proceed when you have positively established a zero-energy condition and protected the disconnecting means from being accidentally turned back on.
What Tools Do I Need to Replace a Solar Inverter?
The exact tool list will depend on the inverter, but a typical replacement may require:
- A properly rated digital multimeter capable of measuring the system’s maximum AC and DC voltage
- A non-contact voltage tester for preliminary checks only
- Lockout/tagout devices for the applicable breakers and disconnects
- Insulated screwdrivers or bits
- Wire strippers and cutters
- Linesman’s, needle-nose, and channel-lock pliers
- A torque screwdriver or torque wrench
- Manufacturer-specified sockets, hex keys, or specialty bits
- Appropriate personal protective equipment
- A phone or tablet for inverter commissioning
- Access to the manufacturer’s installer application or monitoring portal
- The installation and replacement instructions for the exact inverter model
The torque tool is worth emphasizing. Inverter terminals, breakers, disconnects, and mechanical lugs must be tightened to the manufacturer’s specified torque. Guessing by feel can result in damaged terminals, loose connections, overheating, or equipment failure.
Gloves should also be selected for the actual hazard. Ordinary work gloves or products offering vague “dielectric protection” are not substitutes for properly rated electrical protective equipment.
The safest approach is to establish and verify a de-energized condition rather than relying on gloves to protect you from energized components.
Will the Replacement Inverter Need to Be Commissioned?
Usually, yes.
Modern inverters are not always operational as soon as the conductors are connected. Depending on the manufacturer and system, commissioning may include:
- Registering or scanning the replacement inverter
- Connecting it to Wi-Fi, cellular, or Ethernet
- Selecting the correct utility grid profile
- Pairing power optimizers or other devices
- Configuring production and consumption meters
- Setting export-control parameters
- Installing firmware updates
- Reconnecting the system to its monitoring account
- Confirming that all panels, optimizers, batteries, or meters are communicating
- Completing a manufacturer replacement or RMA process
Some of these functions require an installer account or access to the existing system’s monitoring site. A homeowner may be able to perform part of the process, but that does not mean every replacement can be fully commissioned without manufacturer or installer involvement.
Do I Need a Permit or Utility Approval to Replace an Inverter?
Possibly.
A like-for-like warranty replacement may be treated differently from changing the inverter’s model, output rating, operating mode, or system configuration. Requirements vary between jurisdictions and utilities.
Before replacing the inverter, check with:
- Your local building department
- Your electric utility
- The inverter manufacturer
- The company administering the system warranty
- The owner of the system, if it is leased or covered by a power purchase agreement
Changing the inverter’s power rating, adding batteries, changing export settings, or altering the system design is more likely to require updated plans, permits, inspections, or interconnection documentation.
Even when a contractor performs the work, the local authority may require an electrical permit and final inspection before the system is returned to service.
When Should I Call a Solar Inverter Professional?
Call a qualified solar service professional when:
- You do not know exactly where the system connects to the electrical service.
- You cannot identify every AC, DC, battery, and backup power source.
- The system does not have clear or accurate labeling.
- You are not experienced with high-voltage DC.
- You do not have a properly rated meter or do not know how to prove the meter is working before and after testing.
- The inverter is connected to a battery or whole-home backup system.
- The system uses supply-side connections or equipment ahead of the main breaker.
- Conductors, terminals, disconnects, or connectors show signs of heat damage.
- The inverter failed because of a ground fault, arc fault, insulation fault, or recurring overvoltage condition.
- The replacement is not an exact approved substitute for the original inverter.
- The system must be recommissioned through an installer-only application.
- The monitoring account must be transferred or rebuilt.
- Permit, inspection, warranty, or utility requirements are unclear.
- You are not completely confident that you can perform the work safely.
You should also consider having the system diagnosed before ordering an inverter. An error code or loss of production does not automatically mean the inverter itself has failed.
The actual problem could be damaged wiring, an open PV string, failed optimizers, a tripped breaker, grid-voltage problems, communication issues, incorrect meter readings, or a fault elsewhere in the system.
Replacing an inverter without confirming the cause of the failure can leave you with the same problem and an expensive new piece of equipment.
If you are in the Sacramento area and are not sure whether the inverter is actually the problem, learn more about my solar inverter diagnostics and repair services. A proper diagnosis can help determine whether the inverter needs to be replaced or whether the problem is somewhere else in the system.
Can I Replace My Solar Inverter Myself? The Bottom Line
Can you replace a solar inverter yourself? In limited circumstances, perhaps.
A simple like-for-like replacement on a basic grid-tied system may be within the capabilities of a genuinely qualified and properly equipped homeowner. But this is not a project where watching a few videos and owning a multimeter makes someone qualified.
The system must be correctly diagnosed, every source of energy must be isolated, the absence of voltage must be verified, all connections must be completed and torqued correctly, and the replacement inverter must be properly commissioned.
Permitting, utility, warranty, and monitoring requirements may also need to be addressed.
If any part of that process is unfamiliar, hiring a professional is the right call. The money saved by performing the replacement yourself is not worth risking serious injury, damaging the new inverter, voiding a warranty, or creating a connection that overheats later.
Leave a Reply